


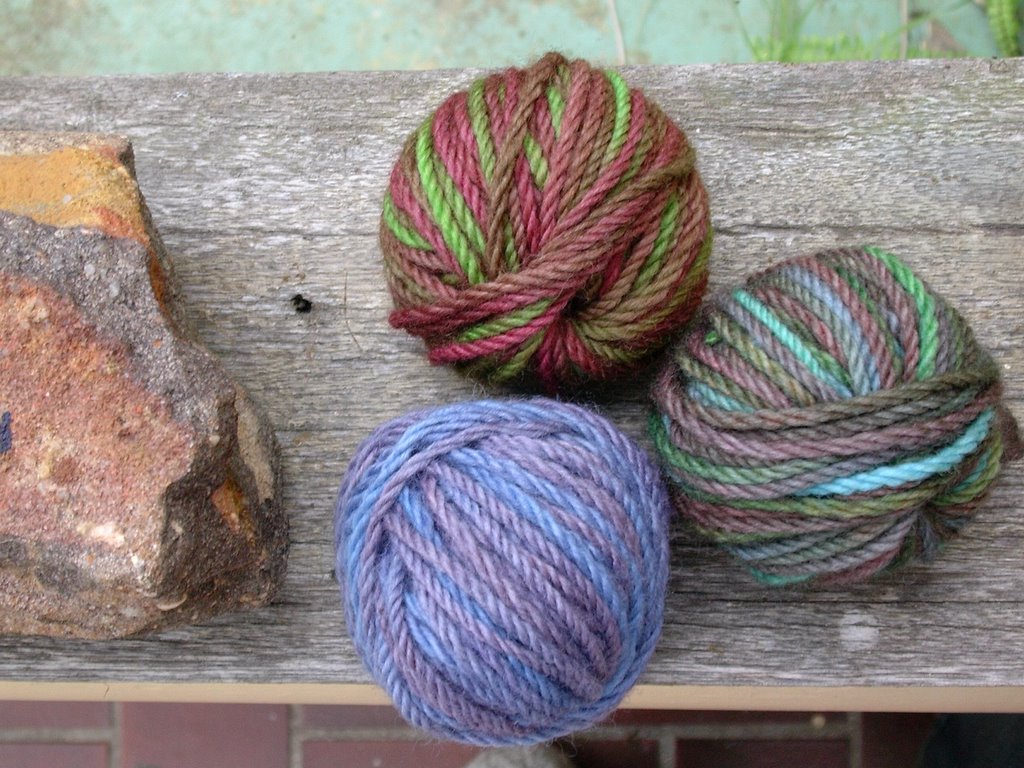
 "mum, I want to dye some wool" exclaimes littlemissA....
ehem, little did she know i had no prior knowledge of non-toxic dyeing other than the
mountains of info i could find on the web about Koolaid... of which we do not have down here in Aussie-land..(perhaps Tang would work?)... so, I decided to side-step the powdered drink & jelly dye options, & cut to the chase : food colours ( you know the ones that you make playdough with!)... and (cheer) it works really really well... it's colourfast and simple to do, and quick too!! (Especially good for those of us who love quick results)..
Herein lies the proceedure for your dyeing pleasure!
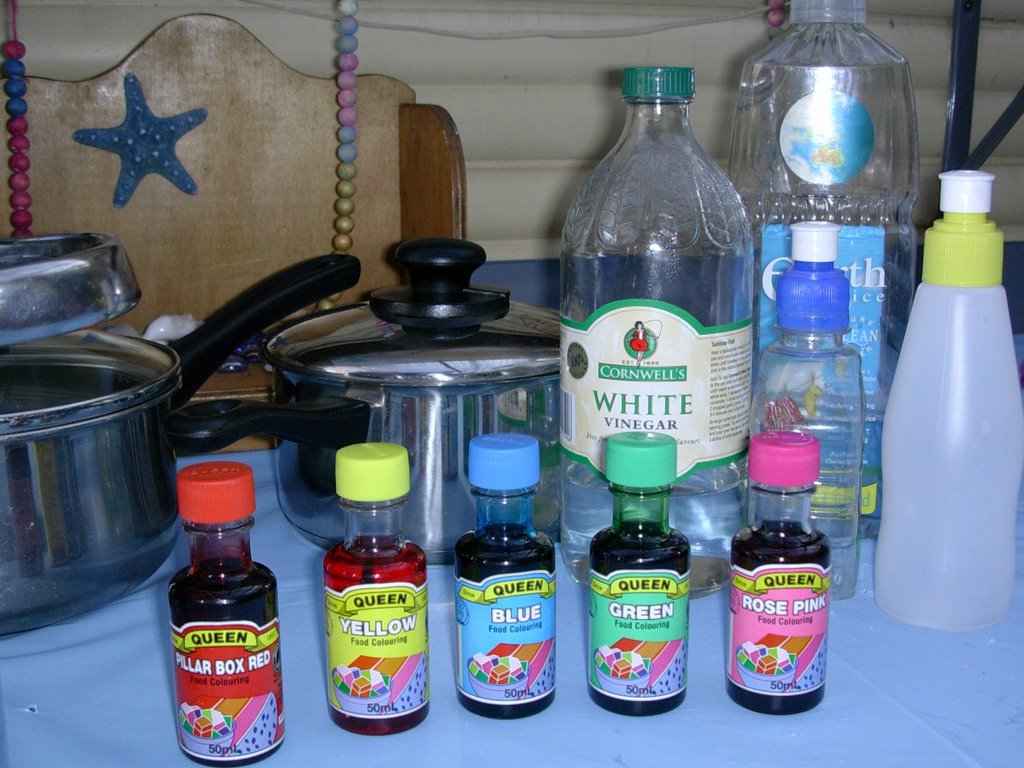
STEP 1: GATHER your ingredients ..
fortunately everything you need will most likely be in your kitchen:
yarn; food colours (i'm using Queen brand) ; white vinegar; wool detergent; x2 bowls for soaking and dyeing; microwave/stove; measuring cups; turkey baster/sauce bottle/medicine dropper for applying dye.
 STEP 2: pre-soak your yarn..
 -place a dash of wool detergent into vessel of choice ( i used a saucepan to retain heat) ;
-then put in the hottest tap water to touch, and vinegar, to a ratio 8 parts water : 1 part vinegar.
(using 120 grams yarn, i used 2 litres water: 1/4 cup vinegar)
-Soak for about 1/2 an hour.
-Squeeze,
-then place into heat-proof bowl.
It is a good idea, but not essential, to put your yarn into a skein if you can, so the yarn is well washed - it seems to take better to the dye this way.
STEP 3 : Add colour - the fun part!!
 -Mix the hottest tap water & vinegar to a ratio of 4:1 -
(I used 1 cup H2o : 1/4 cup vinegar per 30 grams yarn) ;
-Add the colour to the above liquid. You will need to be rather experimental with the amount of colour, but around 3mls (40drops) gives a vivid colour representation;
-Apply the colour using any of the above applicators, poking the colour into the yarn, ensuring you get into the middle.
This liquid to colour ratio is good if you like variegated colour, but if you want
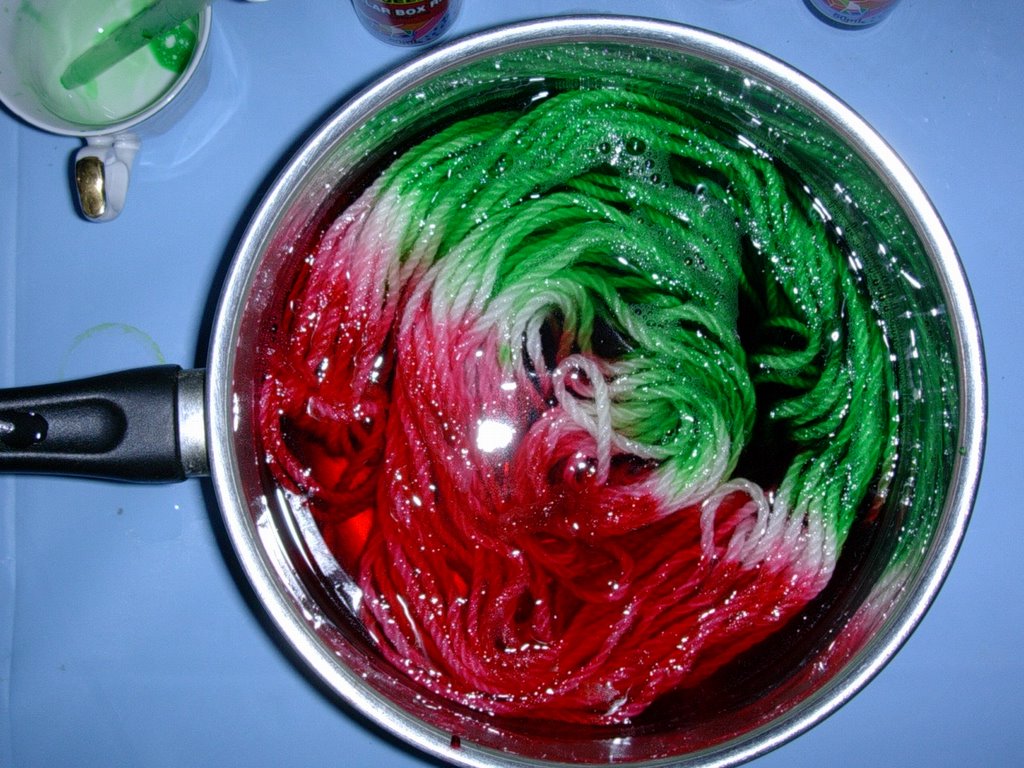 more even colour distribution you may like to add a little more water - just don't have the yarn floating in dye, as the yarn will have trouble soaking it all in.
 STEP 4: heat set the colour.. (this is the best way to ensure colourfastness)
-Cover your heat-proof bowl (stab a few small air holes if using plastic cling wrap);
-Place in Microwave for 2 mins on High; let rest; repeat until water goes clear.
If water hasn't gone clear after 4 or 5 goes, then it probably won't take it all (maybe a bit too zelous with the quantity of colour!!)
-or use on stove top & slowly heat in saucepan until water is clear (ensure minimal liquid is used or colours very quickly turn brown!).
Caution!! steam will burn - 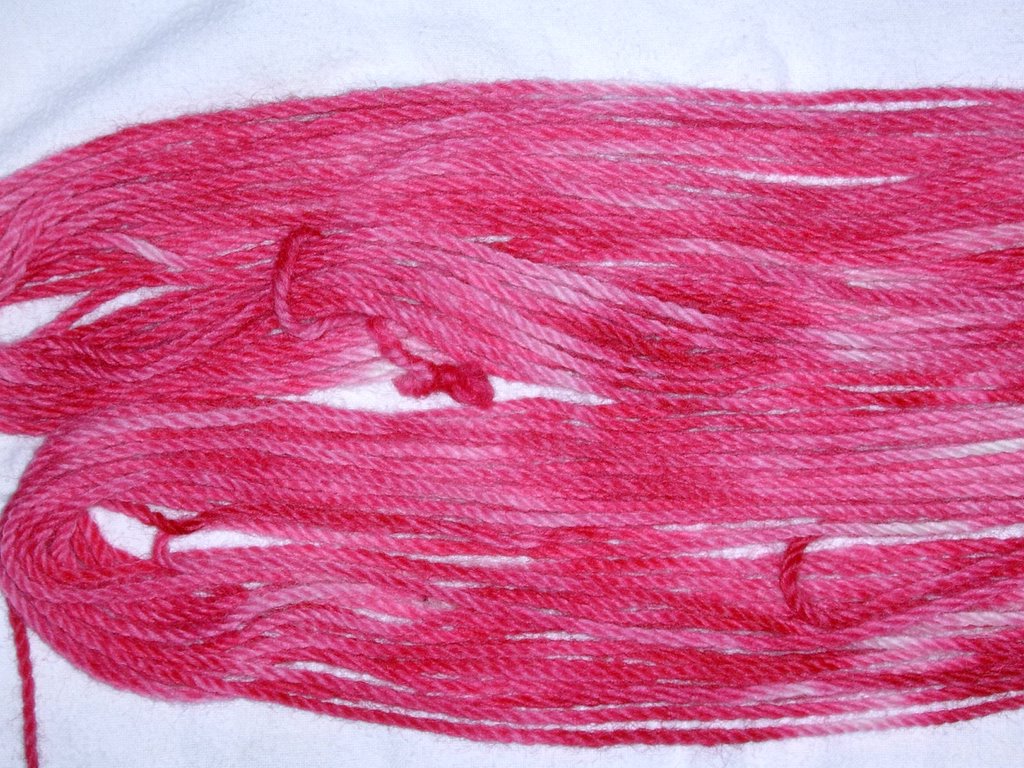
-take out of microwave and rest until most of the steam has gone, then (using precautionary tongs) place yarn into sink to -rinse at same temperature as yarn.
Do not agitate yarn as it can felt. Let water run next to yarn until water is clear.
-Gently squeeze yarn, & hang to dry...
voi la!! Yes this process is addictive (yay!)
____________________________________________________________________
Also, after posting these instructions i was pleased to have received the first printed edition of YARN magazine, in which are also great instructions for dyeing with food-coloring... check it out!
1 comment:
nice to see your food dye ..dying results . i am inspired by the article in yarn magazine as well .
after the christmas madness i plan to have a go .
Post a Comment